Complex Diffraction Limited Spectrometer
The classic spectrometer that one would find in a chemistry lab measures the transmittance of a sample as a function of wavelength. This is a measurement of the amount of the relative power that gets through a sample. Samples typically need to be several millimeters in size. In this work, I built a spectrometer capable of measuring both the amplitude and phase as a function of wavelength for samples that are only several microns in size.
The device consisted of several parts. It begins with a commercial super-continuum laser from Fianium. Super-contiuum lasers use a nonlinear gain element to over amplify a pulsed laser into essentially pulsed static. This destroys the temporal coherence, but maintains the spatial coherence. The effect is white light capable of being focused down to a diffraction limited spot.
Fig 1: Ray tracing showing principle of the diffraction prism monochromator. In practice, the lens and input rotates, not the pinhole.
Fig 2: Super-continuum laser (lower right) illuminating a prism, which diffracts and steers the light to the aperture (center top). Home built motorized stage assembly is seen in top-left.
Fig 3: Sample spectrums from monochromator
The super continuum laser illuminates a diffraction prism which has been fixed to a rotational stage (motorization added post-purchase). This allows us to point only the wavelength the wavelength of interest down the main optical axis of the optical table while aperturing out all other colors. Next the light is focused into a single mode fiber. This effectively acts as a pinhole resulting in a couple mW of power with a couple nanometers of bandwidth.
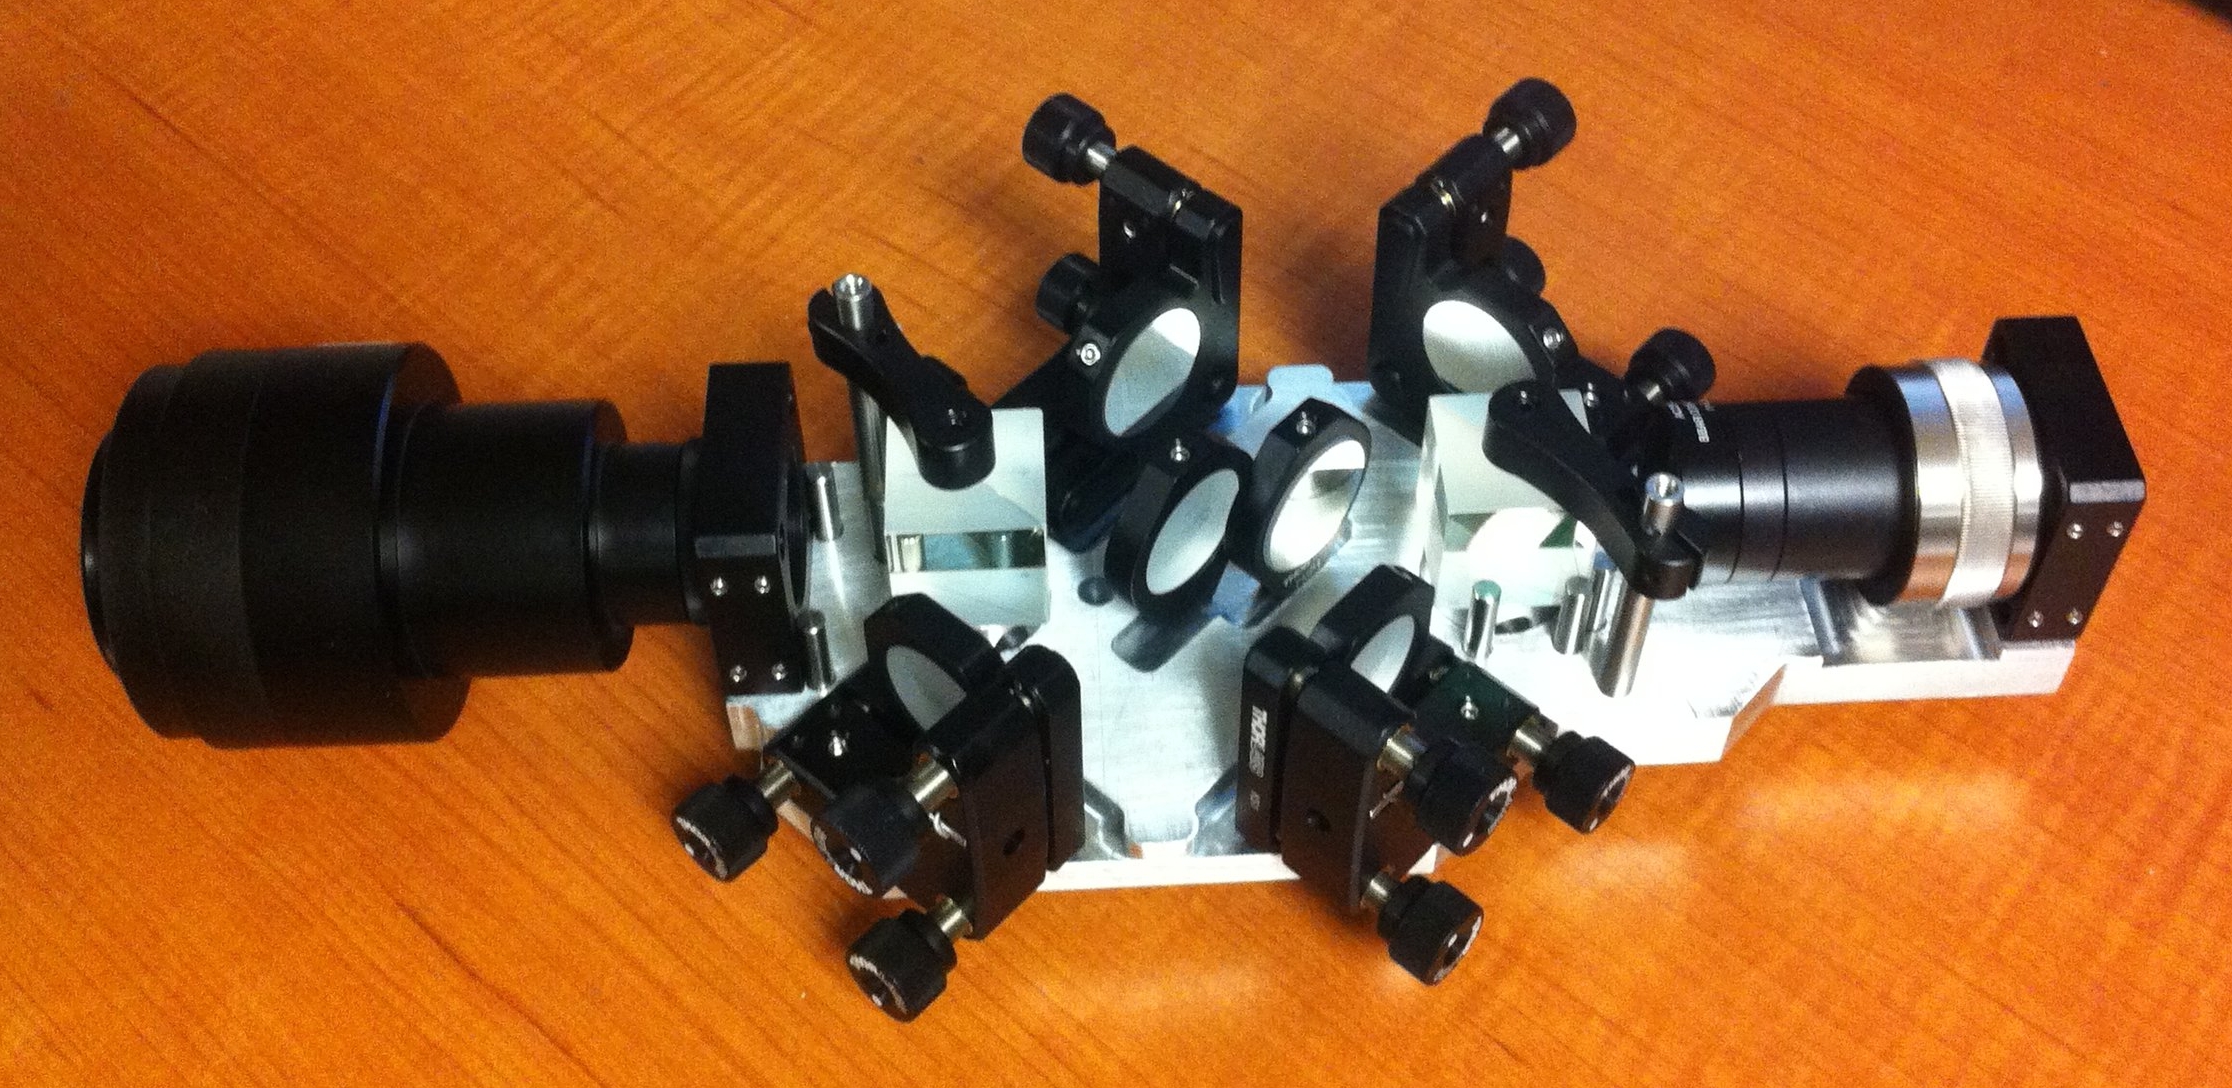
Fig 4: Dual Spot Projection System. (a) Ray-tracing showing how it projects two spots at the upper image plane. These get imaged by the tube lens and objective lens down to the sample plane. (b) CAD rendering of the device. It consist of mostly stock components, but the base and some alignment pins needed to be fabricated. (c) The base. (d) The assembled device after I machined the non-stock components.
This fiber is routed to a home-built device named the Dual Spot Projection System (DSPS). This is mounted to the trinocular port of a microscope, otherwise known as the camera port. Typically trinocular ports are used to capture images and therefore contain an image plane at a known distance where one would put the sensor array of a camera. It follows via reciprocity that if one were to put an image at this plane, it would be projected down to the focal plane under the objective lens onto the sample being looked at. The goal of the DSPS is to take the light coming out of the fiber, split it into two beams, and then create two focused spots at the port focal plane. Ideally these spots should be coherent with each other. The path length of each beam needs to be identical within ~10um. Additionally, they should travel through about the same amount of glass in the beam splitting cubes as this will add a chromatic dispersion.
If this is done correctly, this will result in two coherent diffraction limited spots projected to the focal plane of the objective lens. By placing a camera some distance below this focal plane, we can capture the diffraction pattern created from two spots. This can be calculated based on Fourier Optics and will result in a pattern of stripes. These stripes will shift if the phase of one of the spots is shifted. Additionally, these stripes will wash-out if the power of one of the spots is diminished. It becomes a relatively simple programming challenge to find the complex transmission through a microscopic sample under one of the spots. You can combine the measured power image from each spot in isolation by combining them as complex fields originating at two different locations. The complex transmission coefficient will be the ratio of the complex amplitude of the sample spot with and without the sample present.
We tested the device on two samples. In the first sample, the we deposited 200nm SiO2 onthe 50nm Si3N4 TEM window. The reference and sample beams are placed horizontally from each other. First they are shot through the upper two broken windows in the image below to get the references. Then they are shot through the lower two windows to take the measurement.
Fig 5: Sample. Reference beam would be on the left. Sample beam would be on the right. Top two windows are cleared for calibration run. The sample is in the lower right. Note that the stresses of depositing SiO2 on the thin window caused deformation. The focused spot was small enough to only illuminate the center of the window were it appears flat.
Fig 6: Snap shot of the experimnetal outputs for a single frequency.
Fig 7: Theoretical (left) and experimental (right) results for 200nm SiO2 onthe 50nm Si3N4 TEM window.
We decided to try it on something a little more interesting. I fabricated a metasurface fishnet structure out of gold. This was designed to have a resonance in the visible band. The entire pattern was only 3µm across, which is way too small for conventional spectrometer.
Fig 8: (left) Metasurface fabricated by cutting a fishnet cut into gold using Focused Ion Beam lithography. (right) The theoretical (dashed) and experimental (solid) complex transmission curves. Red is the real part. Blue is the imaginary. Orange is power.


